Best Product Photography Light
Best Product Photography Light - When it comes to product photography, there are a lot of factors to consider. One of the most important is lighting. Proper lighting can make all the difference in showcasing your products in the best possible way. In this post, we'll explore some of the best lighting options for product photography, as well as offer tips and ideas for achieving stunning results.
Reflectors and One Light Setup
Image by John Mak Photography
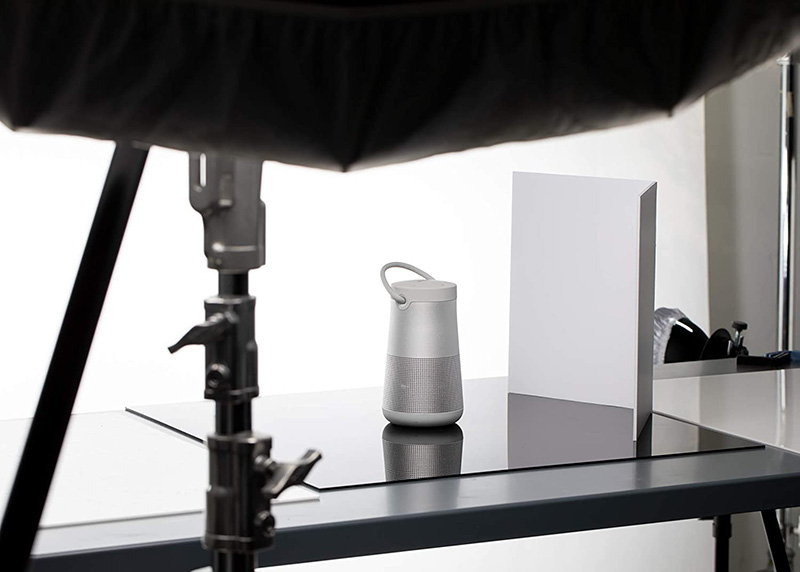
If you're on a budget or don't have access to multiple light sources, a reflector and one light setup can still produce great results. This setup involves using a single light source, such as a strobe or continuous light, and positioning it in a way that creates even lighting on your product. To fill in any shadows, you'll use a reflector, which bounces light back onto the product. This technique is especially effective for small products that don't require a lot of setup space.
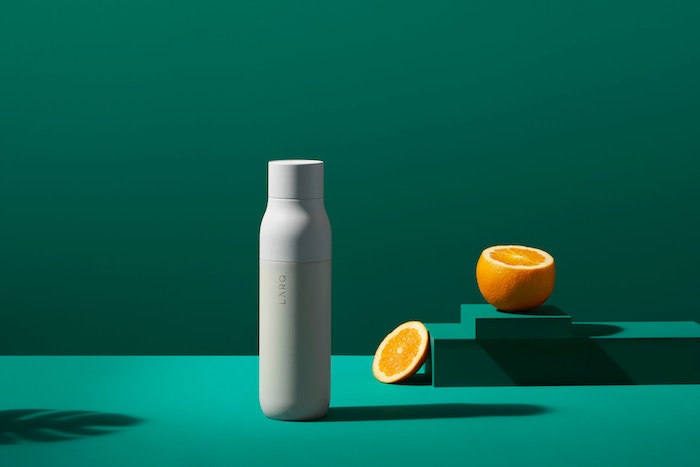
Staged Product Photography
Image by BWD

If you want to showcase your product in a more visually interesting way, staged product photography is a great option. This involves creating a scene or using props to make your product stand out. For example, if you're selling a piece of jewelry, you could place it on a bed of flowers or on a model's hand. This technique adds depth and interest to your product images, which can help them stand out to potential buyers.
Product Photography Lighting Kits
Image by Hypop

If you're looking for a complete lighting solution for your product photography, investing in a lighting kit is a great option. These kits come with a range of lights, backdrops, and modifiers that allow you to create a variety of lighting setups for your products. They can be a bit pricey, but the investment is worth it if you plan on doing a lot of product photography or want professional-level results.
Lens Choice for Product Photography
Image by Expert Photography
Another important factor to consider when taking product photos is your lens choice. A macro lens is a great option for small products, as it allows you to get up close and capture all the details. If you're shooting larger products, a standard zoom lens will work well. Keep in mind that the lens you choose will affect the look and feel of your photos, so it's important to choose one that fits your vision.
Tips and Ideas for Product Photography
Now that we've discussed some of the best lighting options and lenses for product photography, let's dive into some tips and ideas for achieving stunning results.
- Use a tripod to keep your camera steady and avoid blurry photos.
- Clean your products thoroughly before photographing them to avoid dust or smudges showing up in your photos.
- Create a consistent look and feel for your product photos by using the same lighting setup and backdrop for each product.
- Experiment with different angles and compositions to find the most visually interesting way to showcase your products.
- Edit your photos to enhance their color and clarity, but don't go overboard - your goal is to create a realistic representation of your products.
Conclusion
Product photography can be challenging, but with the right lighting setup and lens choice, you can create stunning photos that show your products in the best possible light. Whether you're on a budget or have a bigger budget to work with, there's a lighting solution that will work for you. And with these tips and ideas, you'll be able to create product photos that are sure to catch the eye of potential buyers.
Read more articles about Best Product Photography Light
Post a Comment for "Best Product Photography Light"